The XBee is a series of small radio modules that implement the Zigbee protocol and work well with Arduinos.
XBees are made by Digi. The range includes a number of options: you almost certainly want some variant of the Zigbee range. The Series 2 (S2) modules seem to offer good performance, low power, and a useful range of functions. There are several different antenna types and two different radio powers (2mW and 50mW): larger power provides more range (1km nominal as opposed to 100m) at the cost of twenty-five times the power consumption: best avoided unless really needed. A collection of XBee modules co-operate to form a mesh network that’s quite robust against partial failure, which makes them great for use in the field.
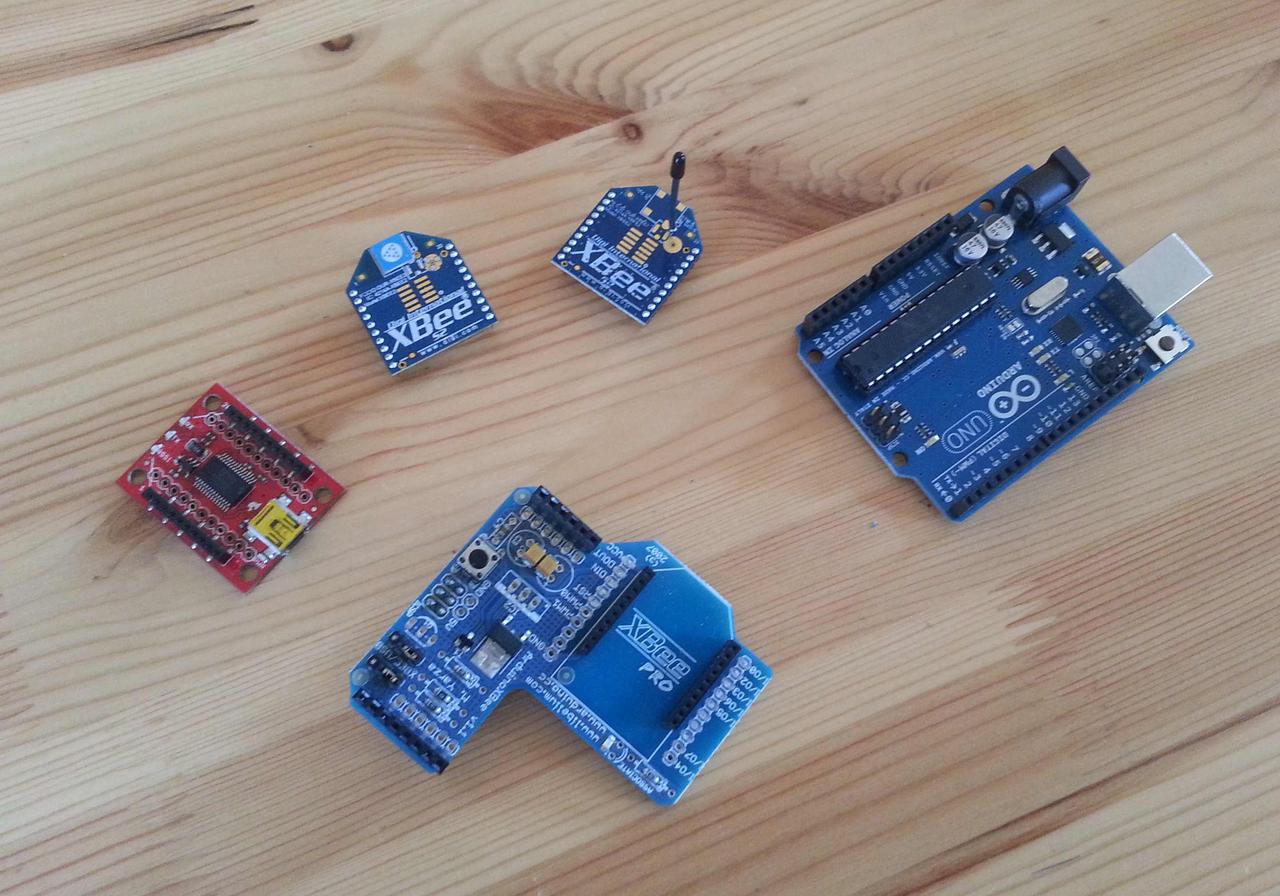
To get XBees working with an Arduino you need several pieces of hardware and software:
- Two or more radios (obvious, but surprisingly easy to only buy one…)
- One or more Arduinos
- One Arduino XBee shield for each radio-equipped Arduino
- One XBee USB breakout board
- The X-CTU firmware management software
When buying radios, buy them all the same series: the different series aren’t guaranteed to interwork (although they often do). In the photograph above there are two different XBees: one with a patch antenna and one with a whip antenna.
The Xbee shield fits on top of the Arduino. They’re sold without a radio module.
The breakout board is used to connect an XBee to the USB port of a computer, allowing your network to be accessed from the desktop. This is useful for debugging and for data logging, unless you’re also going to build a dedicated data logger.
The X-CTU software manages the firmware on the radio module. Because the radios are small and low-power, they don’t have room for a sophisticated software stack, and so aren’t programmed in the normal way. Instead you download a firmware providing exactly the functions you need. Each network is given an identifier (a personal area network id or PAN) so that several networks can co-exist in the same area without interfering with each other. Each network has exactly one co-ordinator, with the others being routers, Co-ordinator and router use different firmware: you nominate one of your radios as co-ordinator (which will typically live on the base station, or on the data logger) and use X-CTU to load co-ordinator firmware to it; the other radios get router firmware and are placed onto the sensor motes.
XBees actually have two communication modes you can choose between, by choosing different firmware. The simplest is the AT firmware. These provide simple, text-based communications between radios: what one Arduino writes as text comes out on the other. In this mode the XBee also responds to Hayes AT commands, a standard way of controlling a modem (which is what an XBee technically is): we’ll explore these commands in another post. This function set — router and co-ordinator — sets up what might be called a transparent network, in the sense that it behaves just like a serial pipe. This makes it easy to get things up and running.Text-based interaction isn’t great for computer-to-computer communications, however, not least because of the effort (and memory) needed to understand text-based protocols. For this reason, the XBee also supports API function sets that provide binary communications. These are better for computers, and faster when running, but require more programming and more intellectual effort to understand. We’ll deal with API communications in another post too.
We’ll deal with the details of using X-CTU in another post, as well as explaining how to set up a simple network.